Tech Deep Dive - IPv6 at Home

For those interested in the technical steps/details of how I got IPv6 running at home, this is the post for you.
- Create a RIPE profile and associated entries
You'll need to create a RIPE profile on RIPE Access; after creating and verifying your profile you should create person, organization, and maintainer entries in the RIPE Database.
2. Order your ASN and IPv6 from Securebit (and possibly VPS)
This is fairly self-explanatory, but you will need to fill in some information from step one in your order; you'll receive additional information via email on the form you must complete and any changes that you may need to make to your RIPE DB entries. If you're not based/located within the RIPE service region this is also the time that you should order a VPS so that the invoice can be included by Securebit when they send your documentation to RIPE.
3. Setup RPKI and route6 object(s)
RPKI records are configured via the Securebit control panel:
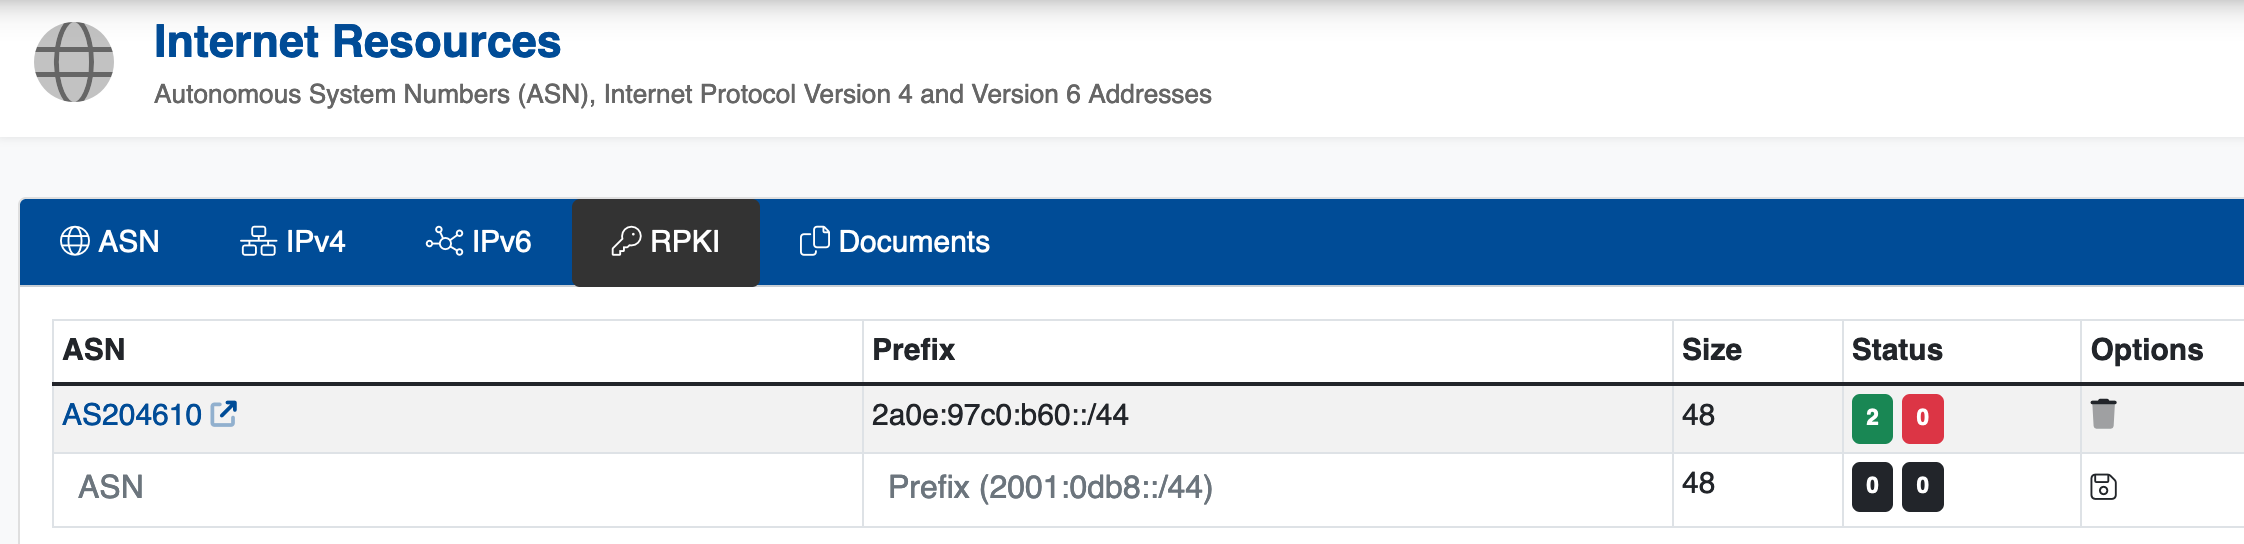
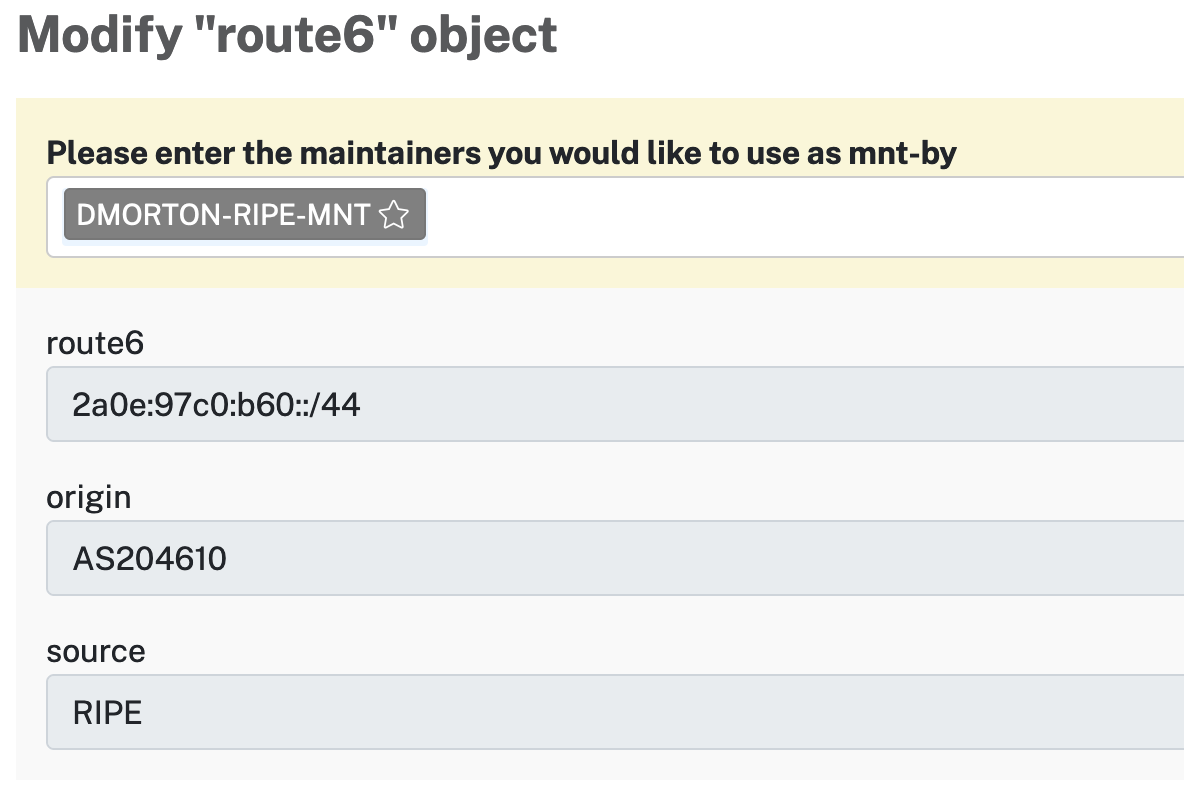
route6 objects are created in the RIPE DB and have a similar ASN/Prefix Setup:
4. Setup BGP on your Vultr account
Create an account at Vultr if you haven't already; once done you can add BGP to your account using Products -> Network -> BGP. You'll need your assigned ASN, IPv6 block and a Letter of Authorization (you can find this in the Securebit control panel). After submitting the form, you'll also need to verify your ASN and IPv6 block via email by clicking the verify buttons in the Vultr control panel.
5. Create Vultr server and configure BGP
After Vultr has set up BGP on your account, you should create a server to function as your router in the Vultr DC; you should pick a DC that is close to you so that your traffic incurs the least amount of additional routing as possible. I recommend creating a Debian 11 (Buster) server and all of the commands/configurations below will be for configuring a Debian 11 server.
First, you'll need to install the bird BGP daemon with sudo apt install bird . After bird is installed you can disable the unneeded IPv4 daemon with sudo systemctl stop bird && sudo systemctl disable bird. You'll then need to configure the bird6 daemon in /etc/bird/bird6.conf with the config snippets provided by Vultr on the server page; my bird6.conf file looks like this:
# Change this into your BIRD router ID. It's a world-wide unique identification
# of your router, usually one of router's IPv6 addresses.
router id 144.202.69.212;

# The Kernel protocol is not a real routing protocol. Instead of communicating
# with other routers in the network, it performs synchronization of BIRD's
# routing tables with the OS kernel.
protocol kernel {
        scan time 60;
        import none;
#       export all;   # Actually insert routes into the kernel routing table
}

# The Device protocol is not a real routing protocol. It doesn't generate any
# routes and it only serves as a module for getting information about network
# interfaces from the kernel.
protocol device {
        scan time 60;
}

protocol bgp vultr
{
        local as 204610;
        source address 2001:19f0:6401:19ee:5400:04ff:fe09:6f2b;
        import none;
        export all;
        graceful restart on;
        multihop 2;
        neighbor 2001:19f0:ffff::1 as 64515;
        password "2xLspTK8F55H7uaG";
}

protocol static
{
    route 2a0e:97c0:b6a::/48 via 2001:19f0:6401:19ee:5400:04ff:fe09:6f2b;
}
After updating the configuration file, you'll then want to restart bird6 and make sure its enabled on boot with sudo systemctl restart bird6 && sudo systemctl enable bird6.
Once bird6 has been restarted you can then make sure the BGP session has started with birdc6:
# birdc6 show protocols vultr
BIRD 1.6.8 ready.
name     proto    table    state  since       info
vultr    BGP      master   up     2022-06-20  Established

# birdc6 show protocols all vultr
BIRD 1.6.8 ready.
name     proto    table    state  since       info
vultr    BGP      master   up     2022-06-20  Established
  Preference:     100
  Input filter:   REJECT
  Output filter:  ACCEPT
  Routes:         0 imported, 1 exported, 0 preferred
  Route change stats:     received   rejected   filtered    ignored   accepted
    Import updates:        1591981          0    1591981          0          0
    Import withdraws:       135717          0        ---    1727698          0
    Export updates:              1          0          0        ---          1
    Export withdraws:            0        ---        ---        ---          0
  BGP state:          Established
    Neighbor address: 2001:19f0:ffff::1
    Neighbor AS:      64515
    Neighbor ID:      155.138.250.89
    Neighbor caps:    refresh restart-aware AS4 add-path-rx
    Session:          external multihop AS4
    Source address:   2001:19f0:6401:19ee:5400:4ff:fe09:6f2b
    Hold timer:       150/180
    Keepalive timer:  1/60
6. Configure GRE Tunnel
I use a simple GRE tunnel to connect my home network to my Vultr server. On the Vultr server use a simple script to set the tunnel up. You'll need to decide on the following values to populate into the script:
Tunnel IPv4 Network - RFC1918 network to be used inside the tunnel
Tunnel IPv6 Network - /64 IPv6 block carved out of your annouced /48 to be used inside the tunnel
Routed IPv6 Network - /64 (or smaller) to route to your home network
#!/bin/bash

/sbin/ip tunnel add gre1 mode gre remote <REMOTE_IP> local <LOCAL_IP> ttl 255
/sbin/ip link set gre1 up
/sbin/ip addr add <TUNNEL_IPV4>/24 dev gre1
/sbin/ip -6 addr add <TUNNEL_IPV6>/64 dev gre1
/sbin/ip -6 route add <ROUTED_IPV6> dev gre1
And then I use the this systemd unit file to have the script executed on boot:
[Unit]
Description=Home GRE Tunnel
After=network.target
Requires=network.target

[Service]
ExecStart=<path to script>

[Install]
WantedBy=default.target
7. Configure Home Router
I use PFsense at home so I set my router up using the IPv6 Tunnel Guide; the only change I made was using a GRE interface with the guide here instead of the GIF interface mentioned in the IPv6 Tunnel Guide.
Once your home router is set up you should be able to get IPv6 addresses on your end devices and tests on http://test-ipv6.com/ should come back 10/10.